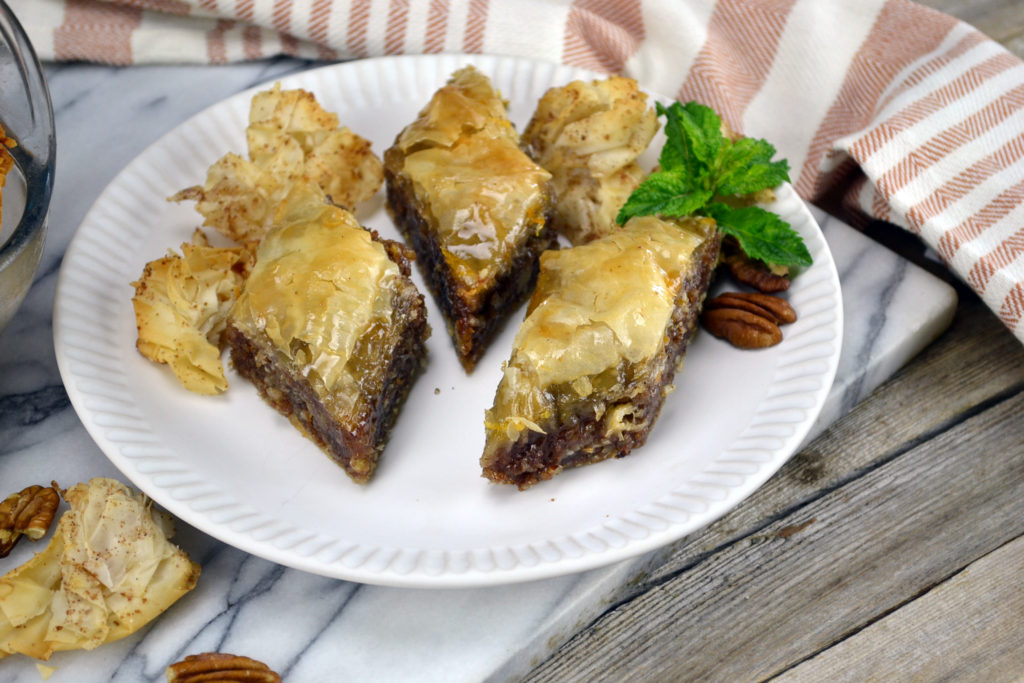
This is a perfect combination of spiced, crunchy nuts, soaked in a sweet, lightly spiced and citrus-scented syrup, all surrounded by a light and crispy phyllo pastry. No one will miss the bee honey in this delicious vegan version of a traditional favourite.
Quick to put together, this well-loved dessert will satisfy a sweet tooth and the craving for something nutty! A cooled syrup is drizzled over the hot pan of crispy phyllo, soaking a center of mixed, spiced ground nuts. Baked to a golden crispiness, this even improves with time, and can be easily frozen.

| Prep Time | 45 minutes |
| Cook Time | 25 minutes |
| Servings |
pan
|
Ingredients
Phyllo Crust
- 1 package phyllo pastry defrosted according to package directions
- 1/3 cup melted Earth Balance
Syrup
- 2 cups water
- 3 cups sugar Organic cane works well.
- 1/2 cup agave
- 2 Tablespoons freshly squeezed orange juice
- 1 Tablespoon fresh lemon juice
- 3 cinnamon stcks
- 1/4 teaspoon allspice
Filling
- 4 cups chopped nuts I like this combo the best: 1 cup pecans, 1 cup almonds, and 2 cups walnuts
- 1/2 teaspoon finely grated orange rind
- 1/2 teaspoon finely grated lemon rind
- 2 teaspoons cinnamon
- 1/4 teaspoon allspice
- 1/2 teaspoon salt
- 1/2 cup agave You can substitute maple syrup.
Ingredients
Phyllo Crust
Syrup
Filling
|
|
Instructions
- Unthaw pastry ahead of time, according to package directions.
Syrup
- You will want to make this first so that it can be completely cool before pouring on. Combine all the syrup ingredients in a large pot and stir together. Bring to a boil and then lower heat to a medium low temperature and allow to cook, stirring regularly, until mixture has become a syrupy consistency. This took mine approximately 20 minutes.
- Once it has reached a syrupy consistency, remove from heat and allow to cool. It is important that this be cooled down before pouring over the hot pastry. This is what keeps the pastry crispy!
Filling
- In a food processor, combine the nuts and pulse until the texture is crumbly and no large pieces remain. Be careful not to pulse too much or you will make butter!
- Stir in the grated rind and spices. Add the agave to the nut mixture and stir.
Baklava Creation
- Heat oven to 350 degrees F. Ensure that you have your melted vegan butter ready with a brush to apply it.
- Once all the parts are ready separately, you are ready to put it all together. Don't be frightened off by phyllo pastry. It is actually quite forgiving. Just work quickly so it doesn't dry out. If a pastry sheet breaks, just patch it back in.
- Brush a 9 x 13 inch pan with a little of the melted butter. Unfold your pastry and gently peel off a layer and lay it onto the pan. Lightly brush the sheet with a little butter and repeat 5 times. Do not feel that you have to thoroughly cover each layer of pastry with butter; a little works well.
- Put a 6th layer of pastry on top but do not butter it. This time, sprinkle about half the filling over the pastry, trying to spread it evenly over the pan.
- Place a layer of pastry over the nuts, lightly butter it and repeat 3 times. With the fourth layer, do not add butter. Spread the remaining half of the nut filling over the pan.
- With the remaining pastry, repeat the process of layering the pastry and lightly buttering between each layer until all the pastry has been used. You will need to trim off the extra pastry that goes over the edge of the pan.
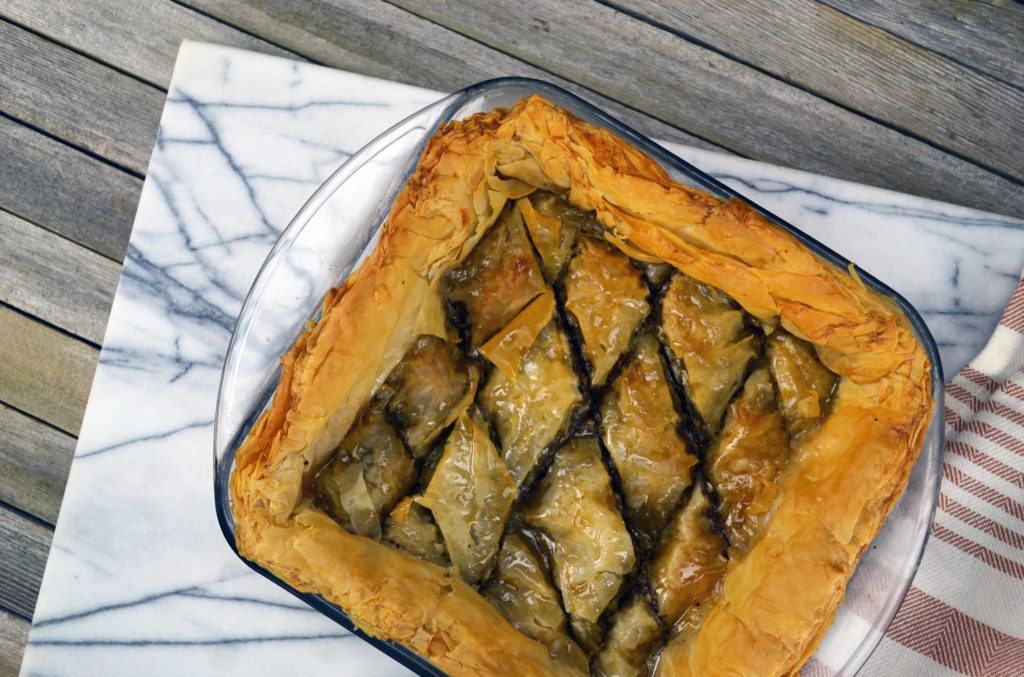
- Now this is the unusual part. You need to cut this up before you bake it! Slice it into serving size pieces. I usually do diagonal cuts and then horizontal cuts so that I have about 20- 22 diamond-shaped pieces. Cut through to the bottom so that the syrup will later be able to drip through.
- Brush butter over the top of the finished pan, ensuring the trimmed edges have been buttered as well.
- Bake the pan of baklava until it is golden brown from top to bottom! This is usually 20-30 minutes. Watch that the pastry does not burn.
- When the pastry is out of the oven, immediately pour the cooled syrup (cinnamon sticks removed) over the hot pastry, soaking all the edges and letting the syrup ooze into all the cuts.
- Let this cool to room temperature before serving. It actually improves with a day or two to allow flavours to deepen.
- Once cool, this can be covered and frozen; it unfreezes so well, staying crispy and delicious!
Recipe Notes
Some recipes suggest roasting the nuts first and I tried this, as nuts are usually better roasted, but in this case, it is a much better final product using raw nuts. This recipe is the result of lots of trials, but it was worth it! It got rave reviews at my daughter's wedding!